Home / Four Inch Splash Versus Full Backsplash
Four Inch Splash Versus Full Backsplash
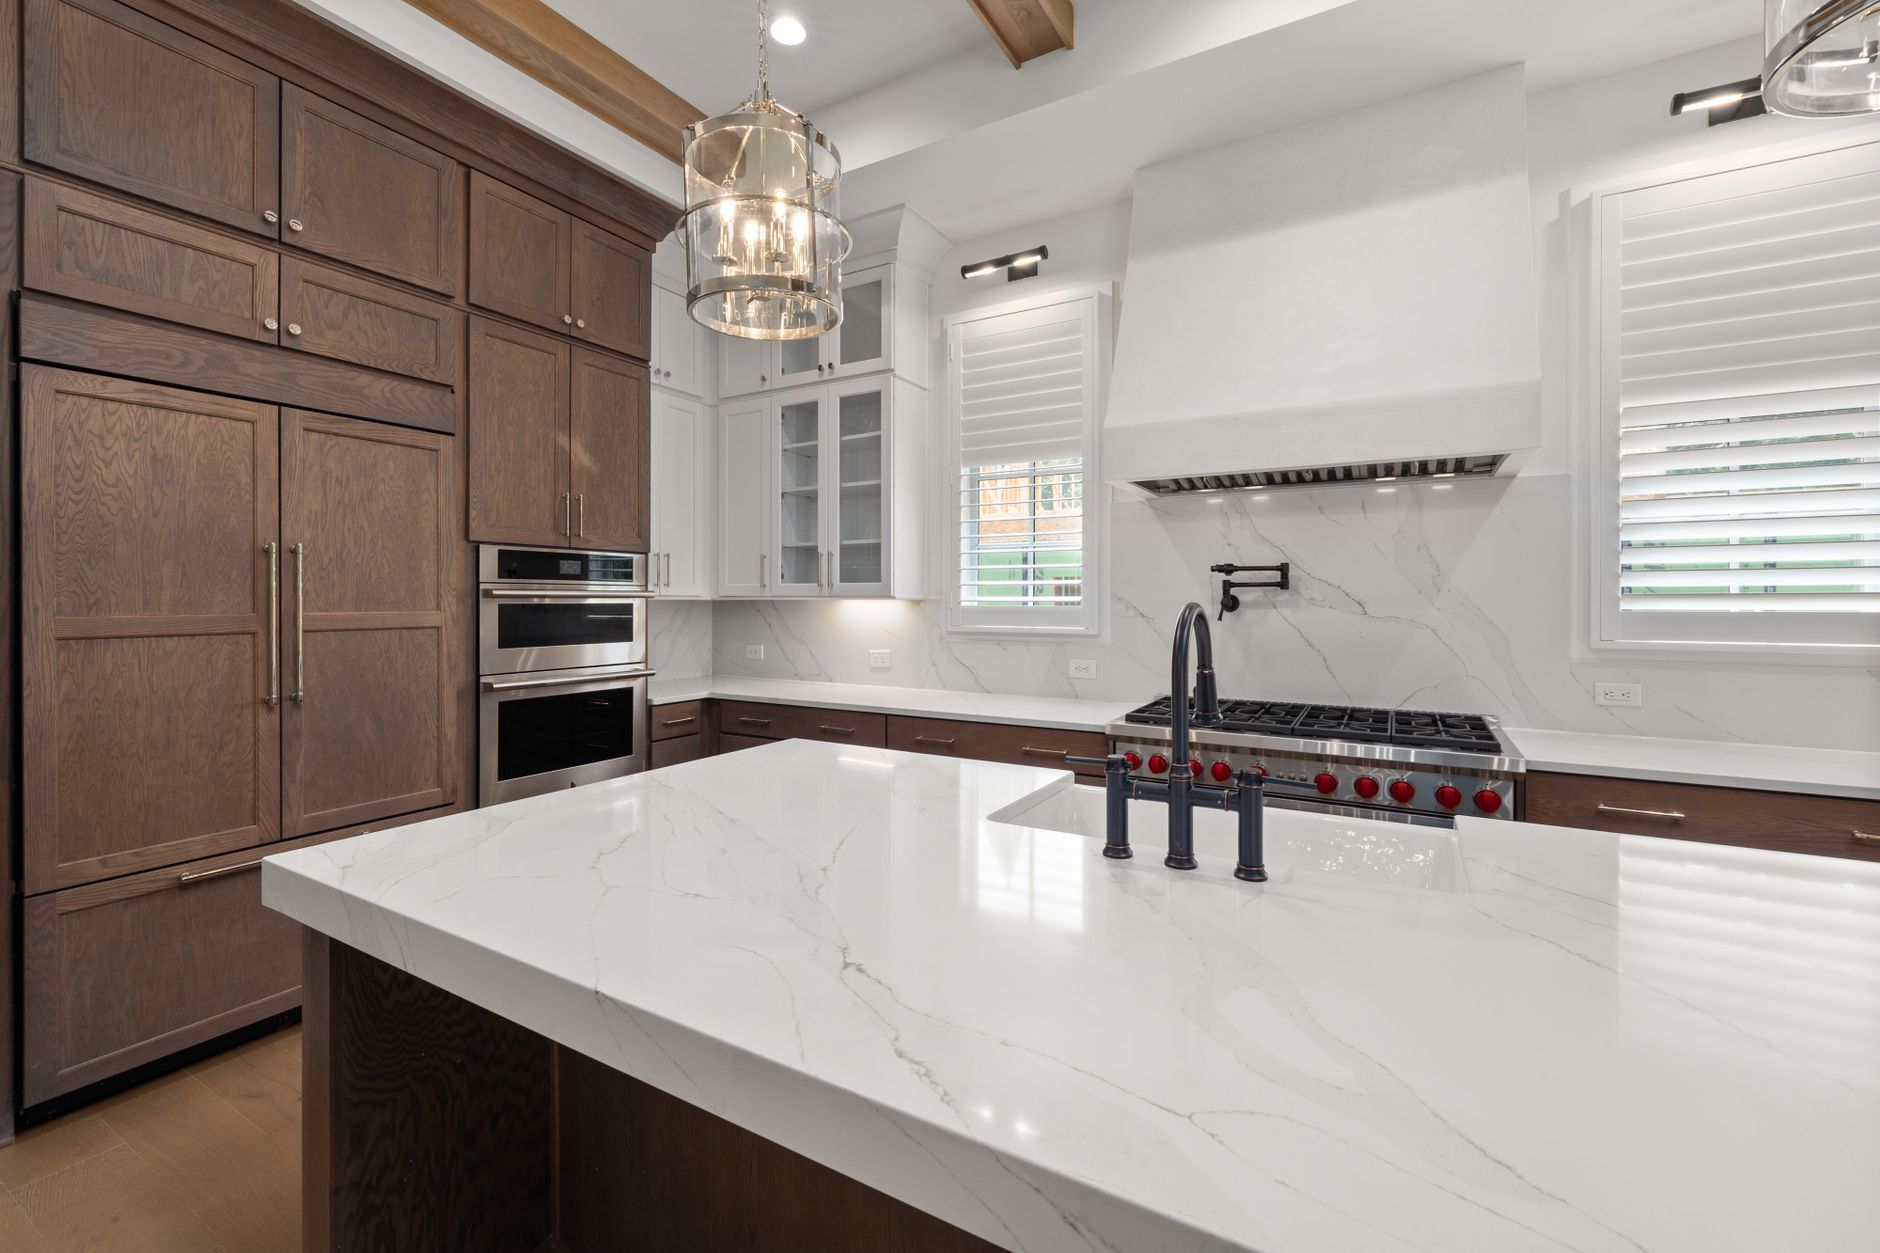
Walk into two kitchens with identical granite counters and the wall behind them can tell completely different stories. One has a thin strip of stone, a few inches high, tucked against the paint. The other has material climbing to the cabinets. The choice between those two is more than a style preference, and it affects cleaning, cost, and the way the room feels.
What the short splash does
The short stone splash, often called a four inch splash, is a narrow band of the countertop material standing along the back edge of the counter. Its main job is practical. The joint between a counter and a wall is never perfectly straight, and the splash covers that gap, stops water from running behind the counter and gives spills a place to stop.
It is typically cut from the same slab as the counter, which makes it match exactly, and it is attached with a thin line of adhesive and a bead of matching caulk along the top and bottom. Because it uses only a small amount of material, it adds little to the project.
What the taller version adds
A taller backsplash extends higher, sometimes a foot or more, or all the way to the upper cabinets. It protects a larger area of wall from splatter, and it creates a bolder look. In a kitchen with a cooking zone, the extra height covers the area where oil and sauce actually land, rather than leaving that to paint.
Between the two lie several middle heights. A splash that rises six or eight inches covers a little more wall without becoming a full feature. These in between choices often appear in bathrooms and utility areas.
The wall behind the short splash
With a short splash, the wall above it stays exposed, so the paint or wall covering has to cope with whatever the kitchen throws at it. A washable paint with a satin or semi gloss finish holds up better than a flat one. Some homeowners add a strip of tile or a painted trim line to finish the transition, so the wall and the splash read as one design.
Behind a sink or range, the exposed wall takes the most abuse. Many people use a short splash across most of the counter and a taller panel only in those two spots.
When a taller splash makes sense
- Behind a range or cooktop, where grease and heat are concentrated.
- Behind a sink, where water splashes the wall every day.
- In a kitchen with plain walls, where a taller stone surface adds visual interest.
- When the upper cabinets are close to the counter, leaving a limited gap to fill.
- For a cleaner look in a rental or high use space where easy wipe down matters.
When the short one is enough
A short splash is a good fit when the wall is already finished with a tile pattern or decorative surface, when the kitchen is used lightly or when the budget is tight. It also suits spaces like a laundry room or a home office counter, where little splashing happens. In a bathroom vanity, a short splash is the standard, because the main purpose is to seal the joint.
Installation differences
A short splash is simple to install. It sits on the counter and is bonded to the wall, with the corner joints mitered or butted depending on the design. A taller backsplash requires more careful planning, as discussed in other articles about slab walls. Outlets must be cut, the wall must be flat and heavier pieces need support while the adhesive sets.
Installers usually fit the short splash after the counter is in place and leveled, since it depends on the counter being straight. A taller piece may be set before or after the counter depending on the design.
Cleaning and upkeep
A short splash is easy to clean, but the wall above it is still exposed to the usual kitchen splatter. A taller stone face solves that problem and needs only the same gentle wipe as the counter. The caulk line along the bottom of either type is the part to watch, as it may crack or discolor over time and need replacing. Renewing a tired caulk line takes minutes and makes the whole area look fresh.
Looks and proportions
Design also plays a role. A short splash gives a tidy, understated edge and lets the wall color take the lead. A tall panel makes the stone a major element of the room. In a small kitchen, a tall stone surface in a light color can make the space feel brighter. In a large kitchen with bold veining, it can act as a focal point. Look at the patterns of the slab before choosing, since a strong vein looks different when run vertically.
Corners, windows and where the splash stops
Whatever height is chosen, the ends of the splash need a decision. Against a side wall, the splash simply meets the wall and is sealed with a thin bead of matching caulk. At a freestanding end, such as the side of a peninsula, the splash needs a finished, polished edge, and some installers return the end with a small bevel so it does not look cut off. Under a window, a short splash often runs to the window trim and stops there, while a taller one has to be shaped around the sill. That shaping adds cutting work and raises the chance of a chip, so some people stop a tall panel at the window edge on purpose.
At an inside corner, two splash pieces meet. A tight butt joint with caulk is usual, and a tiny gap is deliberate because walls move slightly with the seasons. A joint packed with rigid filler tends to crack. Outside corners, where a wall juts into the kitchen, are mitered so the veining wraps around the corner convincingly.
Thickness and how the splash is attached
Slab thickness affects how the splash looks from above. A thick stone splash casts a visible shadow line, while a thin one disappears into the paint. The splash is bonded to the wall and to the counter with adhesive suited to the material, and the bottom joint is finished with flexible caulk rather than epoxy so the counter and wall can move independently. Cabinets that sit slightly away from the wall, common in older homes, leave a gap behind the counter that the splash must bridge, which is one more reason to measure the wall at several heights instead of assuming it is straight.
Ways to mix the two
The two options are not mutually exclusive. Many kitchens use a short splash along most walls and a full height panel behind the range. The transition between them needs a clean edge, which the installer can polish and finish. Another approach is to extend the short splash to a taller height only on one wall. That keeps the material cost down while still giving the main work area the extra protection.
The right answer depends on how the kitchen is used, how much wall needs protecting and how much of the budget goes to stone. Spending a few minutes standing at the counter and imagining where grease, water and splatter actually land often settles the question.